


A good friend has a great garden and graciously shares her harvest with me. This week I went over for a dozen or so tomatoes to make a little spaghetti sauce. We grabbed our bags and buckets and headed to the garden, next thing you know we get to chatting and an hour later we had two full bags of maters.
Here's what I came home with

Large maters will go to the sauce, little ones for tomato soup tomorrow since I strain that and all those little guys and their seeds wont matter.
For the sauce I gathered several recipes and used the ingredients that I wanted to. When canning, all my reading has brought me to believe you use the ingredient with the longest processing time and that's what you go by. Since I added meat, we went with that.
To start, cut out the stem area of your tomato and discard. I like to keep a bowl nearby to collect all the "trash" or if you have a compost bowl, throw them in there. Next you can either cut your tomato into quarters or slice an X on the bottom of your mater like seen here

What we are trying to do with all this cutting and slashing is prepare our maters for skinning. While we core and slash the tomatoes you need to start a large pot of water boiling and prepare a second bowl with cold water and ice. Several at a time, add the slashed tomatoes to the boiling water.

Let them boil for a minute then remove and place in the ice water bowl we prepared.

By placing the tomatoes in the ice water, you stop the cooking process. Once they sit for a minute in the ice water start pulling the skins off. At this point they should slide right off. This step is hard to photograph so picture one slimy mater with the tough outside cover slipping right off the juicy mater flesh. Got it?
OK here are some of my tomatoes all skinned and ready for cooking.

Since tomatoes on their own create such a large amount of juice, I didn't add any extra juice to the tomatoes before cooking them down. In a separate skillet I cooked up onions, green peppers, mushrooms and garlic then added it to the tomatoes. I also added a handful of fresh basil to the mix. Then my chosen spices. I also cooked the meat but wait til the end to add it. I used my immersion blender to puree all my ingredients. Our kids wont each chunky sauce so I have to hide everything. The blender does the trick with that.
Here is my blender and my sauce getting all bubbly and sauce like.

Because tomatoes are SO juicy, you need to cook them down for a good bit to make your sauce nice and thick. This is the perfect time to start cleaning up all your prep supplies, and also make some cookie dough! More about that later but here is a picture to hold you over.

At this point your sauce has cooked lets just say an hour or so. Your area is clean. You really need a treat. Go ahead, I know you do. One of my all time favorite cookie recipes comes from http://www.thepioneerwoman.com/ and its her classic/basic cookie dough recipe. I like to make a batch and freeze some for later. I think this falls into the preserving category so it deserves a spot at the canning party. Once you get your dough made, whatever you favorite is of course, I set out 4 sheets of wax paper. You can divide yours however you see fit. Its just two of us here, so 4 sheets will do us fine.
Here they are
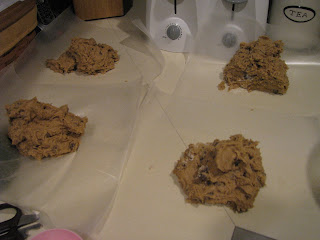


Here they are

Make sure while you are having all this cookie dough fun, you remember to stir your sauce, and, stir your sauce, there you go. Now back to the dough. Once its divided on your paper simply fold one edge over and press it into a tube shape and roll it up.

I twisted the ends and placed them in a freezer safe gallon Ziploc bag. This will hold us over for at least a week, uhhh, I mean a month, lol.
So back to work we go. Here is our sauce getting all saucy.

Mine has cooked down as far as I think is good so I add my meat and get my canning stuff ready. All my jars are washed and sterilized. At this point you want to start your canner boiling and also prepare your lids and rings. I always make sure I have enough jars prepared and a few extra just in case. In this case, I needed more jars, and they were all ready to go! This bunch made 6 full quarts and enough for a bowl for the fridge so my hungry patient has something to eat later on.

Once you get your jars filled with the proper head space, wipe the rims clean and place your lids and rings. Pack your canner and wait. These beauties "canned" for 90 minutes. The wait is always worth it!

This week of canning has me all jazzed to get more stuff canned for our family. Since we had a chilly morning and a cool night tonight I am in the mood for some chili. Check back and I will post our favorite chili recipe.
Don't forget to check out A Latte with Ott, A and From Mess Hall to Bistro for more great canning fun.
Enjoy


2 comments:
Hi Carole,
Thanks for adding this recipe to my canning linky! I have all different kinds of on-going linkys. Feel free to add as many recipes as you'd like!
I love the idea of canning pasta sauce! What kinds of spices do you add? Youve got to try that salsa - so good!!!! :D Thanks for visitng my blog!
Post a Comment