Showing posts with label Sewing. Show all posts

Tuesday, August 31, 2010

Inspiration Wall

So, I was chatting with my BFF on facebook, actually, shes my best friends mom, quilting goddess(she owns a long arm quilter), she posted a comment on my facebook page, but alas, she mentioned I needed an design wall. WHAT? Why is it that it takes one, one line comment to get my creative energy flowing? Seriously, why didnt I think of this a LONG TIME AGO?!?!? Well, it only took me about an hour to decide what my plan of action was going to be. In my craft room, I have the  Expedit shelf from Ikea and I love it, I knew it would make the prefect backdrop for my design slash inspiration wall.  Here is what I came up with.

I used 4 yards of flannel, its always on sale after thanksgiving for around $2 a yard. I cut it in half and sewed both pieces down the center. 

Here is the shelf behind the "design wall" lol
 
I forgot to mention that anything seen from this photo forward can not be held against me.  I have nothing to say about the amount of fabric jammed in those boxes.  lol

Here is apicture of the top of the fabric, where it attaches to the shelving unit.

All I had was black velcro.  I didnt want to use anything that would damage the shelf and i wanted this "wall" to be removeable.  The way it hangs, it will be really easy to roll up, and store on top of the shelves, and it will easily roll back down to be used.

What is special about this, and why I used flannel you may ask?  Well, the flannel works like magic and it holds your fabric up on the "design wall" with out any pins.  This way you can lay out your project, or quilt and move things around, take a step back and see how they look before commiting to it.  Seeing things up and in front of you at eye level gives you a much better view and perspective then having it laying on your cutting table. 

I plan to steam the wrinkles out of the fabric tomorrow, but I was so excited to get this done, I had to share right away!

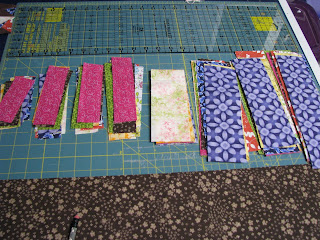
Here is the top to the table runner I posted about a few days ago.  See how nice it is hangin up there, no pins or anything. 


Monday, August 30, 2010

Baby Boys

Just about everyone I know who is expecting is having boys.  Blech!  Seriously, I long for someone to have a sweet baby girl, so I can justify buying some cute girly fabric. And I want to sew ruffles!!!! Yes Ruffleeesssss! Instead, we will settle for all these boys and keep praying for more girls to enter this world soon. ;)  I shouldnt have this attitude about the topic.  All the boys who have entered this world to friends and aquaintances have been healthy and happy, bouncing baby boys. I know, trust me I know, that we should just be blessed with the bundle of joy, but I really want to sew some girly stuff! Work with me here.

Here are some pictures of some gifts for friends.  I was even blessed to get photos of the sweet little guy in these, but I wont post those here. 


I made her a total of 4 burpies and two onesies.  I added jumbo ric rac to the tops of the fabric on the burpies.  But would these be super cute in some purple and hot pink? 

I will list similar sets in my shop this week.  2 burpies and a onesie $25 includes all custom embroidery work.

Join in on the link up for Making Friends Monday More details by clicking on their button below


Sunday, August 29, 2010

Table runner pattern making

I have been on th elook out for the perfect pattern for a table runner.  After loads of surfing the net, I found several.  My problem was I had fabric in mind to use, and the patterns I found, well, I want to make those in the colors they are shown in.  Oh well, here are some pictures of where I am starting.  More to follow this week to chart the progress.  I am also drafting my own pattern for this, lots of notes and changes to measurements, its been a fun process. 


These are the fabrics I went with.  My daughter picked these out.  I was going to help her make a dissapearing nine patch but with a broken arm, that will have to wait. 

Here are my triangle pieces waiting to get joined.


It is a modified log cabin type pattern that I was going for.  Here are the pieces for the logs.


Thursday, August 26, 2010

Decorating your canning jars

Besides using my jars for canning, I also like the way they look around the house.  They serve many uses in my house, candle holder, button container, candy corner corraler, etc.  I decided to  put together a little photo tutorial to share over at A latte with Ott, A  she is having a canning party this week.  Stop by her blog and check out all her fun recipes and ideas and visit the linky party.

I am all for deocrations that are reusable and easy to move from one jar to the next in the event I actually decide to use a precious jar of home canned goodness. 

I made two versions and here are the final products.

FYI Just imagine that jar filled with little pumpkins. 
(Many were sacrificed during the making of this tutorial)

This projects requires the following
sewing machine or needle and thread
scissors
elastic in your choice of size, I used 1/4 inch width
fabric or ribbon in several sizes and colors

I started with fabric for one jar and ribbon for the other.  I measured my jar and doubled that to get the length of my fabric and ribbon.  I also took away an inch and that was my measurement for the elastic.


Here is the ribbon and ric rac I used for my Halloween jar along with the elastic cording


Here are my strips of fabric.  I cut them with a pinked edge so they would have a more primitive rustic frayed effect.


next you are going to go to your sewing machine or grab your needle and thread.  we are going to sew two lines of stitching and create a tunnel for our elastic to go through.  Make sure you make it wide enough fo ryour elastic and to allow for whatever you will use to thread your elastic through.  I like to use a large safety  pin.  You can see it in the pictures below.


When you have your little tunnel made start threading your elastic thru until the end is even with the edge of your fabric or ribbon.  STOP at this point we are going to make a few stitches so the elastic stays put and we can keep threading our elastic thru so our material will gather up.


Once we secure the first end, continue threading the elastic thru and secure on the other end with a few stitches, either by hand or using your sewing machine.


Once your elastic is secured at each end, put right sides of fabric or ribbon together and sew the edges together.  Seam allowance is what ever you think works for your fabric.  You may also heat seal your ribbon ends at this point to keep from fraying.

And here is the finished product.  I trimmed my fabric down on the first one I made.  I think it looks better this way on my jar.


Enjoy. 
 Tomorrow I will be canning meat sauce.  Stop back in and see what I come up with.
Photobucket