Thursday, March 21, 2013

Kick start spring break

What a wonderful way to start my long weekend and kick start spring break, with fun news!

We were chosen as a Mommy Parties host for a Ridemakerz Xtremecustomz Party! 

I know I have will have some excited little ones in my house when this party pack arrives.  
Here is a link for more fun, Ridemakerz 


Friday, February 4, 2011

Something for the babies

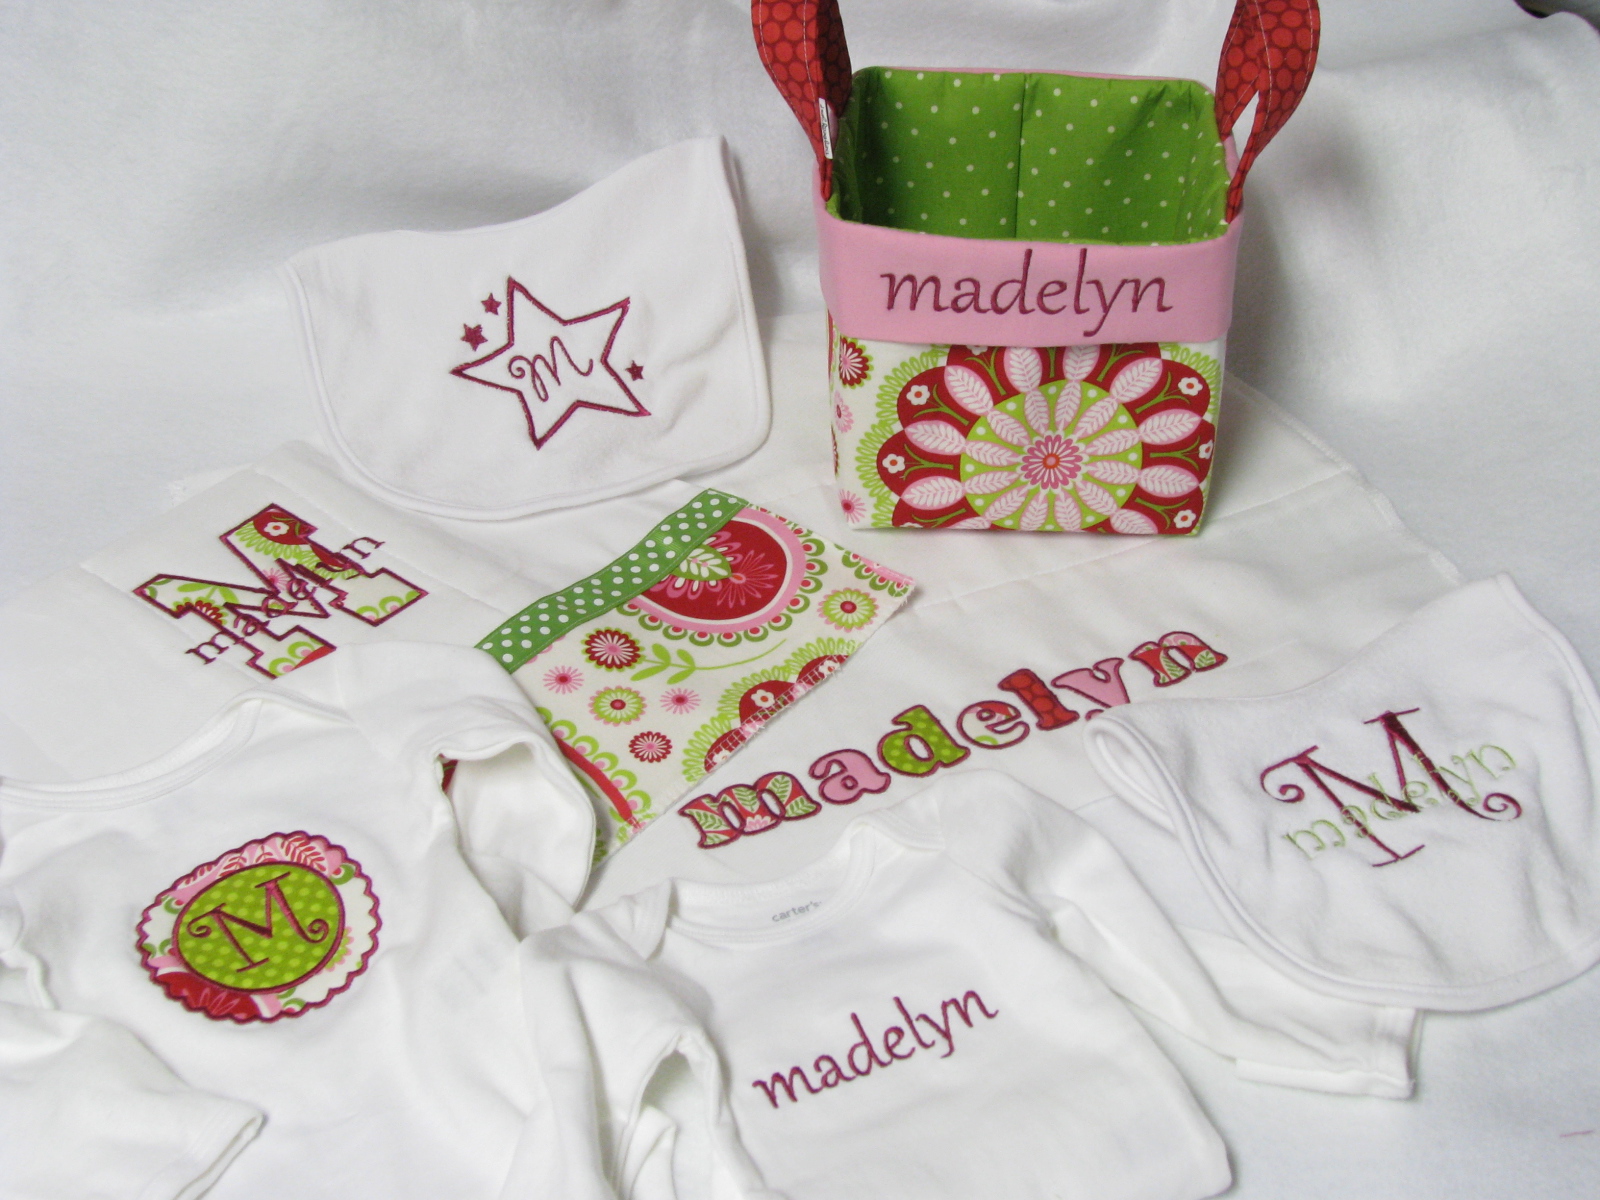
I was recently asked to create a shower gift for a friend.  My limitations were this, had to be girly!  This is what I came up with


I'm just in love with making those little fabric baskets.  So much fun to make and super cute.  If you want one of your own message me here or through my etsy shop here 

Loving this Michael Miller fabric line, Gypsy Paisley!

Enjoy


Monday, January 31, 2011

Bento Boxes and a great new shop

Ive been wanting to join the Bento revolution for awhile.  I follow several blogs that share bento creations and just love the fresh food they are offering their familys, and how cute they are displayed.  I was recently invited to a new shop and made a few purchases. Here is one

Im thinking my daughter is going to love this for valentines day.  Hoping it fits nicely in her valentine basket I made.

Here is another one we purschased and Im no sure if its for me or my daughter yet, lol.


Visit Joss & Main and check out what else they have.

Enjoy


Saturday, January 29, 2011

Moving, ugh

Moving.  That word makes me tired.  Hearing it, saying it, listening to it causes fatigue.
We have been blessed more then most military families to be stabilized for a VERY long time.  So long in fact I almsot forget we are a military family sometimes. Besides the year long deployments, camo, and combat boots that are sprinkled around the house, I feel like we have joined the civilian world again.  Its amazing how much joy stabilization can bring.  Moving. The thought of moving brings us back to reality.  Its sobering. The end. Well, not so much this time.  I am actually excited for a new house, the loads of new opportunity that await us, and the joy of living with my husband again without 2 hour commutes.
Ive mentioned this before but I long for a breakfast bar.  One of the things this move brings me is a breakfast bar! Woohooo.  Seriously folks, its the little things.  Among other pieces of furniture we want to buy, I need barstools   I am up in the air about what style will be the most fun and functional with 4 kids.  Im thinking some without a back, and with a solid surface.  At the same time, I would also like to be able to make some cute and funky chair pads too.  Anyone have an opinion on what works for their family?

Here is one I have picked out so far.


Wednesday, January 26, 2011

Valentines Baskets

Ive been wanting to make some fabric baskets for some time and decided Valentines would be the perfect time.


Orders are already flowing in and I am so excited to see them all come together.  I have some very talented customers when it comes to putting fabric together.

Im hoping to publish the pattern for these soon.  If you would be interested in it, leave me a comment.  I could use the encouragement!

Thanks for stopping by

Enjoy!


Friday, January 7, 2011

What makes you a covergirl?


Visit the COVERGIRL facebook page and sign up for the party to win great prizes and get a chance to star in your very own COVERGIRL ad!


Tuesday, December 7, 2010

Craft show or bust!

Craft show season is drawing to a close with our last sale this coming Saturday at South Knox Elementary in Vincenes Indiana. I will be there with Nords Country Store! Mention this blog post and receive $5 dollars off your $30 dollar purchase. Lots of nice things to help you finish up your holiday shopping. Hope everyone is enjoying all the snow and cold weather. Hope to see you this weekend!
Sent from my Verizon Wireless BlackBerry


Monday, October 4, 2010

Sew much more

When life gets busy, the first thing that gets cut from my to do list is this blog.  I like the creative outlet it allows, but it just isnt enjoyable when I know I have a long list of other things to do.  With the holidays fast approaching, lost of sewing orders, and I wont complain about that. Just keeps us super busy.

Halloween is one of my favorite holidays.  House is always well decorated and very festive.  Along with my new embroidery machine, came the search to find cute Halloween designs.  I have been working on trick or Treat bags.  Here are a few orders.  They are also listed on my Etsy site if you would like one.  Most of the designs I use come from planet applique.


Tuesday, September 14, 2010

Little Cake Boss

Last week, was a bad week.  My sewing machine was in the shop, I wasnt happy.  This week, the machine is back, and its working, beautifully.  Here is what I came up with yesterday.  Short post today, but the pictures say it all.  Cant wait to see this on my little model!


Go to my etsy shop if you would like one custom made for your little cake boss!

Looking for ideas for boy aprons.  So far I have a firetruck, fire hydrant, and pirate ship.  What are your thoughts?


Tuesday, September 7, 2010

Ham and Cheese hot pockets

This summer I canned a lot of things.  Problem is, you put so much work into all those pretty jars, and now I dont want to open them.  But at the same time, I feel ridiculous buying the same things, in cans at the grocery or from the freezer section.  What to do?   yeah yeah yeah, I know the answer is plainly obvious, but the getting past the pretty jars has been a difficult step.  To help push past the hesitation, the girls over at From mess hall to bistro and A latte with Ott, A have started a weekly blog hop.  Check them out and the other folks who are participating.  They are linked at the bottom of this post.

Photobucket

This week, I am opening up a can of tomato soup, but you could also use a can of pasta or tomato sauce.  This week I made homemade ham and cheese hot pockets.  It was originally suppose to be pizza pockets, but apparently no one told me there was a LARGE family of mold living in my pepperoni container.  So, we adjusted on the fly, and it was well worth it!

Ham and Cheese Hot Pockets

you need-

1 can of ready to use pizza dough(I used the longer can of thin crust dough)
Cheese of your choice, shredded
Ham, or your favorite pizza toppings if you are making the pizza variety

for topping-

olive oil
garlic salt or your favorite kind of seasoned salt
italian seasoning

To dip your hotpockets either your canned tomato soup or pasta sauce

Start by rolling out your dough or unrolling it.  you want it to be about 8 x 12


slice it into squares about 2x2 or 3x3  enough so you can pile your cheese and toppings and still gather the dough up and around to form a ball.  Once you make your ball shape, place the gathered side down, so your smooth side is facing up.  You dont want the ball to come apart during baking.

Once you have them all rolled up like so


drizzle with some oil and sprinkle your salt and italian seasoning on top.

Bake at 400 for 15-20 minutes, until lightly browned.


Dip in your choice of sauce, and enjoy. 
Dont forget to stop by and check out the other great recipes this week.


Friday, September 3, 2010

Moving and Selling

Its no secret anymore that we want to sell our house. Its been an ongoing thought and a thorn in myside for sometime now. I had a small accident and havent been able to lift, then my daughter breaks her arm, so my helper, isnt much help either. Needless to say selling has been put off for another month. Meanwhile, I look more and more around my house, envisioning our new home, and what I want in it. Our dining room tables was the first thing hubby and I purchased as a couple. Little did I know, he didnt really like it, but thought it was a short term fix to a tiny house we were living in.  So not only have we added living room furniture to our list of things to buy, but dining room furniture is on the list now too. I have a feeling this is going to be a costly move.


Large Flower Hair Clippy Tutorial

This post falls back to my post where I want more baby girls to sew and create for. My girls are out of the hairbow stage. So  I tricked convinced our local Joanns to let me teach a hairbow and flower clip class among others. So here I am practicing with you, the blogging world.  If you read through my tutorial please leave a comment, tell me what you thought, how it could be better or even if it was spot on.  If you share this on your blog please link back.
 Most of the classes I teach at Joanns are to people who have no creativity or crafty spirit in them at all.  I often assume the little steps are implied, and then find myself going through them step by step in the classes, hoping not to insult anyones intelligence while doing so. 

Here are the clippies finished.


Here is your supply list and a picture, incase you need a visual refence like me


Flower
Hairclip
Large 1 inch gems
Coordinating 3/8 inch grosgrain ribbon
Fabritac glue
E6000 adhesive
needle and thread(I use dental floss)
Scissors
wire cutter(to get your flowers off the stems)

Start by removing the flowers from the stems.  You also want to remove the flower center(yellow fuzzy part)


You might need wire cutters here.


Now your flower should look naked like these


Now we are going to take our needle and thread and sew aroung the hole in the middle.  Our gem is going to cover the stitching.  This sewing is going to keep all our layers of petals together.


It doesnt have to look pretty. Again, the gem will be glued over this area and cover the stitching.


Here are the gems I chose.  These come in lots of colors and shapes. We are going to use E6000 glue to attach these.  DO NOT use fabritac, it will eat the shiney mirror like finish off the back of your gems and you wont like the results.  If you dont have E6000, I dont have any other suggestion for you at this time.

You only need a little bit of glue, its spreads thin once you press it on your flower.
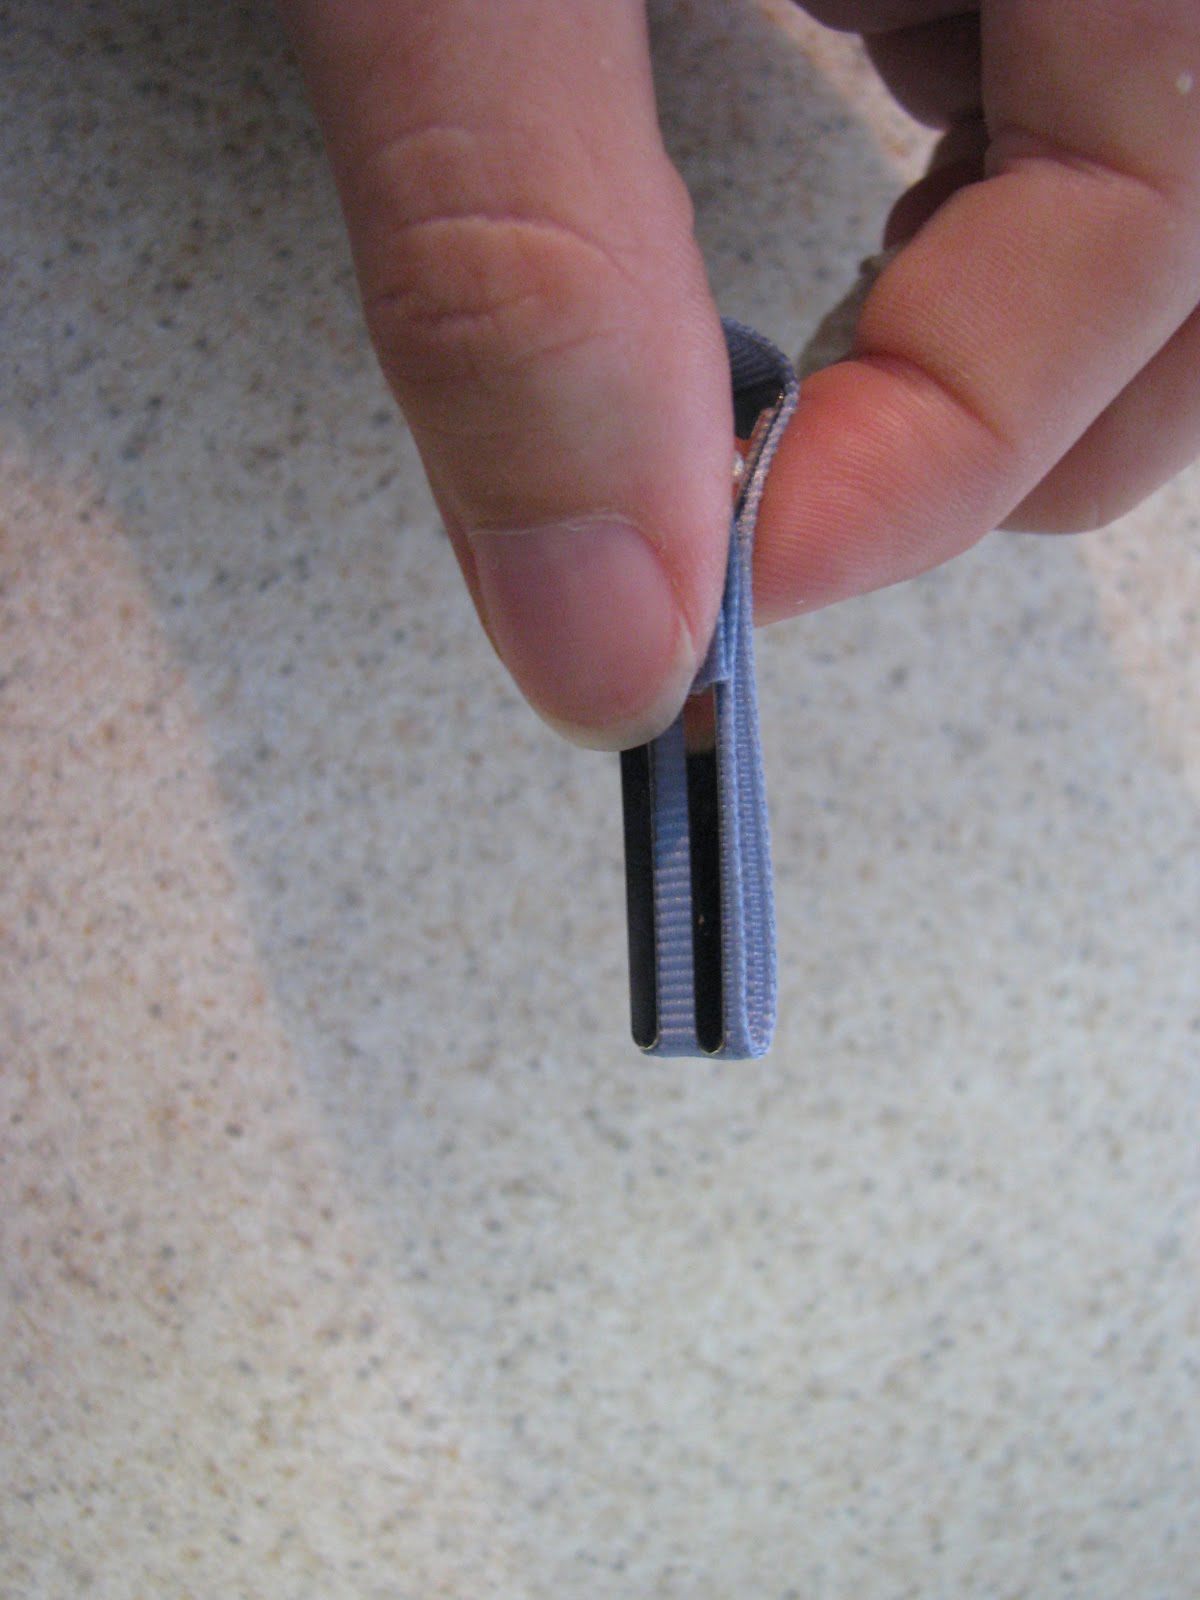
After your gem is placed on the flower with the glue, we are going to line our clips with the ribbon, to give them a more finished look. Once you cut your ribbong to size, I use a lighter and gently pass the ends of my ribbon by the flame NOT THRU THE FLAME and heat seal the ends.

I like to leave one of the prongs of the clip unlined.  You can do it however you would like.  But this is my technique.


I smooth a layer of fabritac on the ribbon to hold it to the clip. Or you could also use E6000, it just takes longer to dry.

Once you get your clips lined lay a small bead of e6000 on your flower backs and place the ribbon side down on your flower.  I use small clamps to smoosh the gem and flower and clip all together, so you have a good glue adhesion to all layers.


And here is the finished product.  Now if I had a little girl model, this would be complete.


Please do not use my photos with out asking, but feel free to link to this post if you want to share this tutorial.


504 Main


Tuesday, August 31, 2010

Inspiration Wall

So, I was chatting with my BFF on facebook, actually, shes my best friends mom, quilting goddess(she owns a long arm quilter), she posted a comment on my facebook page, but alas, she mentioned I needed an design wall. WHAT? Why is it that it takes one, one line comment to get my creative energy flowing? Seriously, why didnt I think of this a LONG TIME AGO?!?!? Well, it only took me about an hour to decide what my plan of action was going to be. In my craft room, I have the  Expedit shelf from Ikea and I love it, I knew it would make the prefect backdrop for my design slash inspiration wall.  Here is what I came up with.

I used 4 yards of flannel, its always on sale after thanksgiving for around $2 a yard. I cut it in half and sewed both pieces down the center. 

Here is the shelf behind the "design wall" lol
 
I forgot to mention that anything seen from this photo forward can not be held against me.  I have nothing to say about the amount of fabric jammed in those boxes.  lol

Here is apicture of the top of the fabric, where it attaches to the shelving unit.

All I had was black velcro.  I didnt want to use anything that would damage the shelf and i wanted this "wall" to be removeable.  The way it hangs, it will be really easy to roll up, and store on top of the shelves, and it will easily roll back down to be used.

What is special about this, and why I used flannel you may ask?  Well, the flannel works like magic and it holds your fabric up on the "design wall" with out any pins.  This way you can lay out your project, or quilt and move things around, take a step back and see how they look before commiting to it.  Seeing things up and in front of you at eye level gives you a much better view and perspective then having it laying on your cutting table. 

I plan to steam the wrinkles out of the fabric tomorrow, but I was so excited to get this done, I had to share right away!

Here is the top to the table runner I posted about a few days ago.  See how nice it is hangin up there, no pins or anything. 


Monday, August 30, 2010

Baby Boys

Just about everyone I know who is expecting is having boys.  Blech!  Seriously, I long for someone to have a sweet baby girl, so I can justify buying some cute girly fabric. And I want to sew ruffles!!!! Yes Ruffleeesssss! Instead, we will settle for all these boys and keep praying for more girls to enter this world soon. ;)  I shouldnt have this attitude about the topic.  All the boys who have entered this world to friends and aquaintances have been healthy and happy, bouncing baby boys. I know, trust me I know, that we should just be blessed with the bundle of joy, but I really want to sew some girly stuff! Work with me here.

Here are some pictures of some gifts for friends.  I was even blessed to get photos of the sweet little guy in these, but I wont post those here. 


I made her a total of 4 burpies and two onesies.  I added jumbo ric rac to the tops of the fabric on the burpies.  But would these be super cute in some purple and hot pink? 

I will list similar sets in my shop this week.  2 burpies and a onesie $25 includes all custom embroidery work.

Join in on the link up for Making Friends Monday More details by clicking on their button below


Sunday, August 29, 2010

Table runner pattern making

I have been on th elook out for the perfect pattern for a table runner.  After loads of surfing the net, I found several.  My problem was I had fabric in mind to use, and the patterns I found, well, I want to make those in the colors they are shown in.  Oh well, here are some pictures of where I am starting.  More to follow this week to chart the progress.  I am also drafting my own pattern for this, lots of notes and changes to measurements, its been a fun process. 


These are the fabrics I went with.  My daughter picked these out.  I was going to help her make a dissapearing nine patch but with a broken arm, that will have to wait. 

Here are my triangle pieces waiting to get joined.


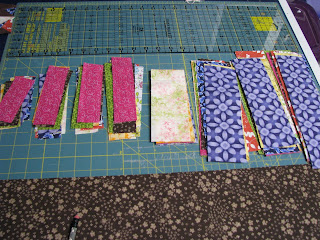
It is a modified log cabin type pattern that I was going for.  Here are the pieces for the logs.


The Great De Stash! Huh WHY?

So many of you are probably thinking the same thing I was when I read The train to Crazy's blog and saw her post about The Great Destash! WHAT? WHY?  Its like sacrificing your first born! Never, Im not going to do it.  Not this sewer, crafter lady, nuh uhhhh! Well I read through some comments and realized there were some great ideas that seemed practical and applicable to my own sewing situation.  Check it out and take the pledge. I have, and I vow, from this moment forward, to reduce, reuse and repurpose from my own stash! 
Do you have suggestions or solutions that work for you?  Post them here and help the rest of us material girls.
Photobucket
I Took The DeStash Challenge Button